What Is a 3 Point Hitch and Why Does Category Matter?
Walk into any farm supply store and ask about a tractor implement, and the first question you will hear back is: “What hitch category are you running?” It sounds like a minor detail, but picking the wrong category is one of the most common — and most expensive — mistakes that both new and experienced tractor owners make. A mismatch means the implement either will not physically connect, or worse, operates under dangerous mechanical stress with every working hour.
The 3 point hitch system was standardized internationally to allow any tractor to attach to any compatible implement safely. This standardization only works when you understand the category system. This guide breaks down every category — Cat 0 through Cat 3 — so you can confidently match your tractor to the right equipment and source replacement parts without guesswork.

Why the system was standardized
Before the three-point hitch became universal, every manufacturer used proprietary attachment systems. Farmers were locked into single-brand ecosystems for both tractors and implements. The Harry Ferguson system — patented in 1926 and adopted by Ford in the late 1930s — changed everything. By the 1960s, the design had been formalized into international standard ISO 730, defining exact pin diameters, lifting point spacing, and hitch dimensions for each category. Today, whether you run a Kubota, John Deere, Massey Ferguson, or any other major brand, you can attach any implement rated for the same category.
What happens when you get it wrong
Using the wrong category creates two compounding risks. Mechanical risk occurs when undersized pins bend or shear under load — a failure mode that typically strikes at the worst possible moment during heavy field work. Safety risk occurs when a mismatched implement detaches unexpectedly during operation. Even a partial mismatch — running a Category 1 implement on a Category 2 tractor without proper adapter bushings — produces poor draft control and accelerated wear on both machines. The hitch category is an engineering specification, not a guideline.
The Four Hitch Categories at a Glance
The ISO 730 standard defines four main hitch categories numbered 0 through 3, each tied to a specific tractor power range and a precise set of dimensional specifications. The table below shows how they compare side by side.
| Category | Tractor HP | Lower Pin Dia. | Top Link Pin | Typical Use |
|---|---|---|---|---|
| Cat 0 | Under 20 HP | 5/8 in (16 mm) | 1/2 in (13 mm) | Garden tractors, micro farms |
| Cat 1 | 20 – 45 HP | 7/8 in (22 mm) | 3/4 in (19 mm) | Compact & sub-compact tractors |
| Cat 2 | 40 – 100 HP | 1-1/8 in (28 mm) | 1 in (25 mm) | Mid-size farm tractors |
| Cat 3 | 100 – 225 HP | 1-7/16 in (36 mm) | 1-1/4 in (32 mm) | Large row-crop & commercial |
HP ranges overlap between categories — always verify with your tractor’s operator manual and pin measurements.
Category 1 — The Most Common Hitch for Compact Tractors
Category 1 is by far the most widely used hitch classification in the world. It covers the vast majority of compact and utility tractors in the 20–45 HP range — machines common on hobby farms, small ranches, landscaping operations, and rural properties. If you own a sub-compact or compact tractor from Kubota, John Deere, New Holland, Massey Ferguson, or similar brands, there is a strong chance your machine runs a Category 1 hitch.
Pin dimensions and arm spread
The defining specification for Category 1 is a lower hitch pin diameter of 7/8 inch (22 mm). The top link pin runs slightly smaller at 3/4 inch (19 mm). Standard lower link arm spread is 685 mm center-to-center. These measurements are rigidly standardized — a Category 1 implement from any manufacturer should physically connect to any Category 1 tractor without adapters or modifications, assuming no significant wear has occurred on either side.
Compatible implements
Category 1 hitches handle a wide range of attachments: rotary tillers, box blades, landscape rakes, post-hole diggers, small plows, subsoilers, rear blades, compact bale spears, and rotary cutters up to about 6 feet wide. The primary limitation is weight — Cat 1 systems are engineered for implements up to roughly 1,500 lbs. Exceeding this figure puts lift arm fatigue and hydraulic pump overload in play over time, even if nothing breaks immediately.
Limited Category 1 — the narrow variant
Some manufacturers, particularly for very small sub-compact tractors, use a designation called “Limited Category 1” or “Category 1 Narrow.” These machines retain Cat 1 pin diameters but have a reduced lower arm spread — typically around 510 mm rather than the standard 685 mm. This narrower spread means some full Category 1 implements will not connect without adapters. If you own a sub-compact tractor under 25 HP, verify whether you have a full or limited Category 1 hitch before purchasing implements.

Looking for Cat 1 / Cat 2 Hitch Replacement Parts?
PRR Tractor Part stocks lift arms, top links, hitch pins, and complete kit sets compatible with Kubota, John Deere, and Massey Ferguson.
Category 2 — The Workhorse of Mid-Size Farm Operations
Category 2 is where agricultural scale begins to shift meaningfully. Designed for tractors in the 40–100 HP range, this category covers the backbone of most commercial farming operations — grain and livestock farms, hay production, and large-scale market gardening. Tractors like the John Deere 3 and 5 Series, Kubota M Series, Case IH Farmall, and New Holland Workmaster all typically run Category 2 hitches.
Dimensional specifications
Category 2 lower pins measure 1-1/8 inches (28 mm) in diameter, and the top link pin is 1 inch (25 mm). The lower link spread widens to approximately 825 mm center-to-center. These larger dimensions reflect the heavier implements Cat 2 is engineered to carry — design load range runs from roughly 1,500 to 4,000 lbs, covering disc harrows, wider rotary tillers, and full-width hay mowers without straining lift geometry.
Common implements for Cat 2 tractors
With a Category 2 hitch, the implement range expands considerably. Heavy-duty rotary cutters with 6–8 foot cutting widths are standard. Large box blades, land planes, 3-bottom plows, disc harrows, chisel plows, grain drills, and hay balers all connect via Cat 2. Sprayer frames, manure spreaders, and rear-mount grain carts are also typical. The key advantage over Cat 1 is the ability to handle uneven load distribution without flexing or deforming hitch components — critical when pulling large implements through heavy soil or wet clay conditions at speed.
Using adapters between Cat 1 and Cat 2
A common question is whether you can use a Category 1 implement on a Category 2 tractor, or vice versa. The answer is yes — with adapter bushings. These machined sleeves bridge pin hole diameter differences between categories. Category 1-to-2 reducing bushings are widely available and inexpensive. However, they should only be used when the implement’s weight and load characteristics are well within the smaller category’s rated capacity. Never use adapters to force a heavy Category 2 implement onto a Category 1 hitch.
Category 3 — High-Power Hitches for Large-Scale Agriculture
Category 3 is built for serious commercial farming — tractors in the 100–225 HP range that pull wide implements across large acreages day after day. If you operate a large row-crop operation, plant thousands of acres per season, or run heavy tillage equipment, Category 3 is almost certainly what your machines are equipped with. This category is standard on the John Deere 7 and 8 Series, Case IH Magnum, Massey Ferguson 7700, and Fendt 700 and 800 series.
Engineering specifications
The lower pin diameter for Category 3 is 1-7/16 inches (36 mm), and the top link pin measures 1-1/4 inches (32 mm). The lower lift arm spread increases to approximately 965 mm center-to-center. Lift capacity on large Cat 3 tractors routinely exceeds 10,000 lbs, enabling the attachment of wide planters, heavy tillage assemblies, and full-size rear-mounted sprayer frames. The hardware itself is substantially heavier than Cat 1 or Cat 2 equivalents — these are not interchangeable components across categories.
Category 3N — the narrow row-crop variant
Some large tractors offer a “3N” (narrow) option, which maintains Cat 3 pin sizes but uses a reduced lower link spread closer to Category 2 dimensions. This variant exists to allow large tractors to operate in narrow row-crop configurations where rear wheel track width is reduced and implement connection points need to shift inward for clearance. Category 3N is primarily found on specialized row-crop machines — if you are purchasing linkage parts for such a tractor, verify which variant you are working with before ordering.
Maintenance demands at Cat 3 scale
Because Category 3 equipment operates at far higher loads and duty cycles, maintenance is particularly demanding. Hitch pins, lift rod ends, draft links, and top link assemblies on Cat 3 systems absorb enormous stress cycles over a single growing season. Worn or cracked components at this scale can lead to catastrophic implement drop events. Inspection of pin wear, bushing play, and weld integrity on lift arms should be part of every pre-season service routine. Replacement parts must always meet or exceed original dimensional specifications — never substitute lower-grade hardware on high-load Category 3 systems.
How to Identify Your Tractor’s Hitch Category
You do not need specialist tools to determine your hitch category. Three reliable methods exist, and using more than one confirms your answer — particularly useful when dealing with older machines lacking legible documentation.
The operator’s manual states the hitch category directly, along with exact lift capacity and compatible implement weight ranges. Fastest and most definitive method for any machine with intact documentation.
A digital caliper across the lower lift arm pins gives a definitive answer: 22 mm = Cat 1; 28 mm = Cat 2; 36 mm = Cat 3. Works reliably even on machines with missing or illegible data plates.
Under 45 HP typically means Cat 1; 40–100 HP usually Cat 2; above 100 HP generally Cat 3. Always confirm with a pin measurement — HP ranges overlap and cannot be relied on alone.
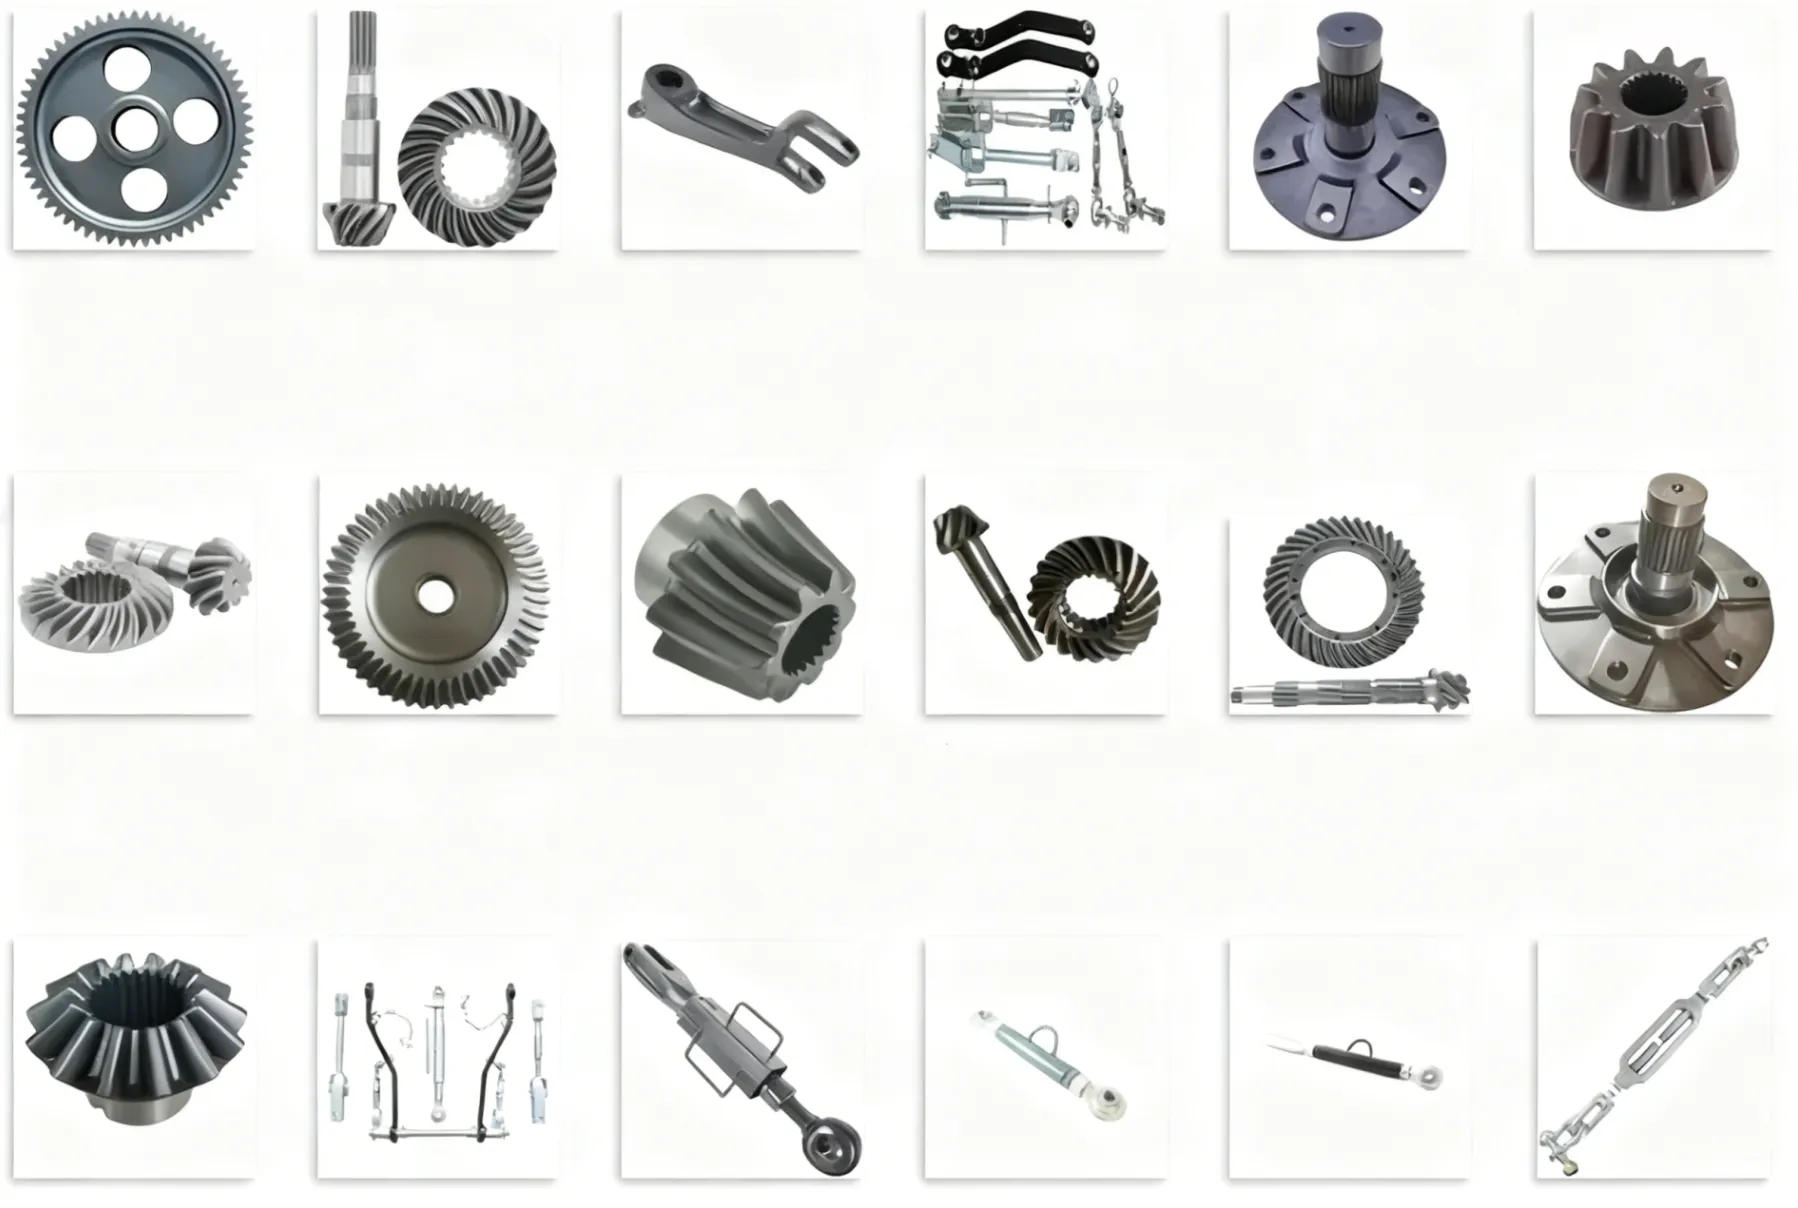
Lift Arms, Top Links, and the Parts That Wear First
The 3 point hitch is an assembly of interconnected components, each with its own wear characteristics and replacement interval. Understanding which parts fail most often helps plan maintenance budgets and avoid downtime during critical planting or harvest windows.
Lower lift arms
Lower lift arms (also called draft links) bear the primary load of any rear-mounted implement. Over time, the pin holes elongate through wear, creating lateral slop that allows the implement to sway during transport. Once pin hole wear exceeds 2–3 mm beyond the original bore diameter, replacement is strongly advised. Continuing to operate with worn holes concentrates stress at the deformed edge and accelerates failure dramatically. See our hydraulic lift arm for Kubota tractor as a representative example of the direct-fit replacements we carry.
Top link assemblies
The adjustable top link controls implement pitch and takes both compression and tension loads depending on implement type and field conditions. Clevis pin holes are the primary wear points — they experience oscillating load cycles throughout every pass. Check for visible bending or cracking at the hex section of the rod, where wrench leverage concentrates stress. Top links should also be inspected for thread corrosion, which can prevent length adjustment at exactly the wrong moment. Our top link assembly for Kubota covers multiple model series and is dimensionally verified before shipping.
Check chains and stabilizer bars
Check chains limit side-to-side implement movement during transport and field operation. They are frequently overlooked until an implement swings wide and clips a fence post or gate. Inspect chain links for elongation and cracks, and check hooks, pins, and threaded studs at both ends for corrosion or mechanical wear. Replacement check chain assemblies are inexpensive insurance against far more costly consequential damage.

Quick Hitches — Saving Time When Swapping Implements
If you run multiple implements on one tractor — common on small to medium farms — a quick hitch adapter is one of the most practical upgrades available. Standard hitch connections require manually aligning each lower pin individually, typically meaning multiple trips behind the implement. On a busy farm, this accumulates to significant lost time across a season.
How quick hitches work
A quick hitch mounts permanently to the tractor’s lower lift arms and top link, presenting a standardized receiver frame to the rear. Implements are fitted with matching receiver pins or brackets. To attach an implement, you back the tractor up, lower the quick hitch frame over the implement pins, and engage the locking mechanism — all from the seat. Time savings per implement swap typically run from 5 to 15 minutes, which adds up to meaningful productivity gains on operations that switch attachments frequently.
Category compatibility considerations
Quick hitches are available in Category 1, Category 2, and Cat 1/2 universal variants. When purchasing, confirm that both the quick hitch frame and your implements are rated for the same category. A common mistake is buying a universal quick hitch and assuming it handles full Category 2 loads — many universal designs are only rated to Category 1 capacity despite fitting Cat 2 implement pins. Always check the manufacturer’s rated lift capacity, not just physical pin compatibility.
PTO shaft length after adding a quick hitch
Installing a quick hitch adapter increases the distance between tractor and implement by several inches, lengthening the required PTO shaft to maintain safe operating angles and telescoping overlap. After adding a quick hitch, verify that your existing shaft still meets the minimum overlap requirement — typically at least 6 inches of engagement at full extension. A shaft that is too short can disengage under field loads, causing sudden torque release and potential drivetrain damage. For a detailed look at sizing and safety standards, see this PTO shaft selection guide.
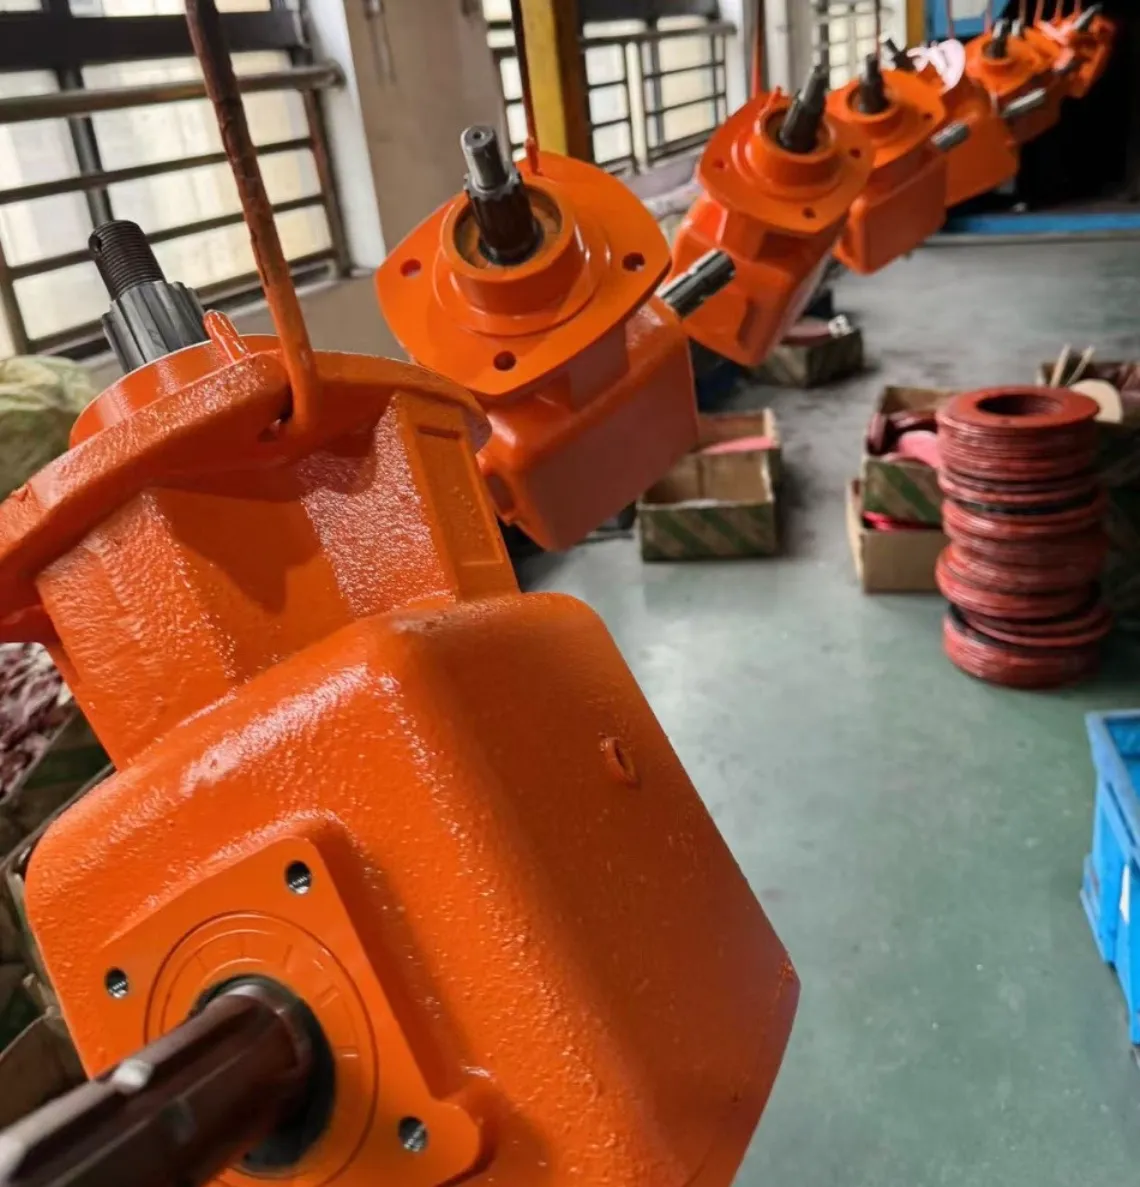
How Hitch Category Connects to Implement Gearboxes
The hitch category does not exist in isolation — it is directly tied to the implement’s internal drivetrain, particularly the implement-side gearbox. A rotary cutter, hay mower, or tiller mounted via a 3 point hitch typically receives power through a PTO shaft connected to an implement gearbox that converts rotational speed and direction to drive the cutting mechanism. When stepping from Category 1 to Category 2, you are usually also stepping up to a more powerful implement gearbox designed to handle higher torque from the larger tractor.
Implement gearbox selection and hitch category must therefore always be evaluated together. A Category 1 implement gearbox is engineered for PTO torque consistent with a 20–45 HP tractor. Connecting that same implement to a 70 HP Category 2 tractor — even with hitch adapter bushings — exposes the implement gearbox to torque levels it was never designed for. Browse our full range of agricultural gearboxes to identify the correct match for your implement and tractor combination.
Seasonal Hitch Maintenance Checklist
A properly maintained 3 point hitch will outlast the tractor it came on. Neglected, it becomes a liability during the busiest parts of the farming calendar. The following covers the key inspection and service tasks that should occur at minimum at the start and end of each operating season.
Pre-season inspection
Before the first implement goes on, inspect every hitch pin for wear, pitting, and deformation. Verify that all retaining clips or hairpin cotters are present and undamaged — these small parts prevent pin loss under load. Inspect all lift arm bushings and lubricate pin contact points with quality grease. Test the hydraulic lift through its full range with no load first, then with a weighted implement. Any sluggishness, drift under load, or uneven lift speed signals a hydraulic issue that needs attention before field work begins.
Post-season storage
At season end, clean all hitch components thoroughly — soil and crop residue trap moisture and accelerate corrosion through the off-season. Apply grease to all exposed metal surfaces, particularly pin bores and thread sections. Extend and fully retract all adjustable components to clear grit from threads before lubricating and storing. If lift arm pin bores show measurable elongated wear, record the dimension and order replacements before the next season to avoid emergency sourcing during a critical window.
Why Source Hitch Parts from PRR Tractor Part?
When a hitch component fails, the pressure to find a replacement fast is real — downtime during planting or harvesting costs more than parts ever will. PRR Tractor Part Limited Partnership was built around working farm operators who cannot afford to wait weeks for an overseas part that may or may not fit correctly.
Provide tractor make, model, and serial number. We cross-reference compatibility before confirming your order.
Stock covering Kubota, John Deere, Massey Ferguson, New Holland, Case IH, Yanmar, and more.
Volume pricing for dealers, workshops, and fleet managers running multiple machines across a season.
All hitch components meet or exceed OEM dimensional specifications for safe, reliable field operation.

Pertanyaan yang Sering Diajukan
These are the questions we hear most often from farmers, equipment dealers, and tractor owners navigating hitch category decisions for the first time.
Ready to Source the Right Hitch Parts?
Browse our full range of 3 point hitch kits, lift arms, top links, and linkage components — verified fitment, competitive pricing.
PRR Tractor Part Limited Partnership | [email protected]
304/1170 Soi Phahonyothin 49/1, Intersection 6, Talat Bang Khen Subdistrict, Lak Si District


